How to Apply Makeup Step by Step with Pictures: Beginner’s Guide
If you want to learn how to apply makeup step by step with pictures, this guide will help you build a simple routine. From skin prep to foundation, eyes, lips, and setting spray, each step is explained clearly so beginners can follow the process and create a smooth makeup look.
Why a Step-by-Step Makeup Guide Helps Beginners
Makeup can feel confusing when you are new to it. There are many products, many tools, and many different ways to use them. You may wonder what comes first, how much product to use, or how to blend everything without looking heavy.
That is why a step by step makeup guide is helpful. It gives you a clear order. It also helps you understand the purpose of each product. Once you know the correct order, your makeup becomes easier, faster, and cleaner.
A good makeup routine does not need to be complicated. You do not need every trending product. You only need the right basics and the right method. With practice, your makeup can look fresh, smooth, and natural.
This guide is written like a makeup tutorial with pictures. That means each step includes a clear image suggestion. These picture ideas can help readers understand what to see, what to apply, and where to place each product.
Makeup Products You Need Before Starting
Before learning how to apply makeup, keep your products and tools ready. This saves time and makes the routine smoother.
For beginners, these are the basic products you may need:
- Cleanser
- Moisturizer
- Sunscreen
- Primer
- Foundation or BB cream
- Concealer
- Setting powder
- Bronzer
- Blush
- Highlighter
- Eyeshadow
- Eyeliner
- Mascara
- Brow pencil or brow gel
- Lip liner
- Lipstick or lip gloss
- Setting spray
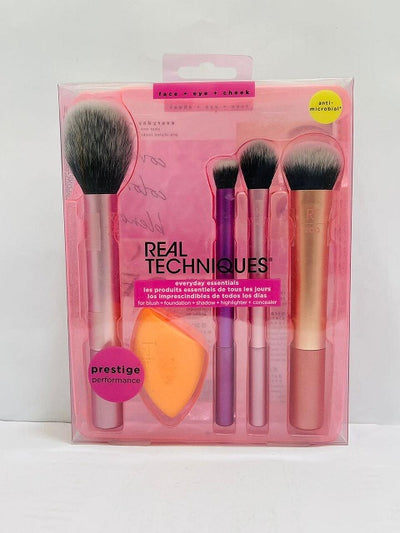
You may also need simple makeup tools such as:
- Makeup sponge
- Foundation brush
- Powder brush
- Blush brush
- Eyeshadow brush
- Brow brush
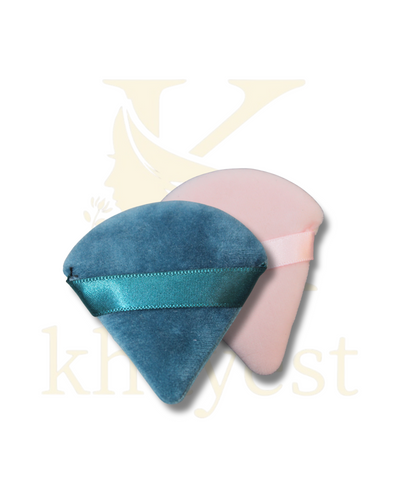
- Powder puff
If you are a beginner, start with fewer products. A clean daily kit can include moisturizer, sunscreen, foundation, concealer, powder, blush, mascara, lipstick, and setting spray. Later, you can add bronzer, highlighter, eyeshadow, eyeliner, lashes, and more brushes.

Step 1: Cleanse Your Face
The first step in how to apply makeup step by step with pictures is cleansing. Makeup looks better on clean skin. If your face has oil, dust, sweat, or old product on it, your makeup may not sit well.
Use a gentle cleanser to wash your face. Then pat your skin dry with a soft towel. Do not rub the skin harshly because this can cause redness.
Clean skin gives you a fresh base. It also helps foundation and concealer blend better. This step is important in hot or dusty weather because the skin can collect oil and dirt quickly.
If you have oily skin, use a cleanser that removes extra oil without making your face too dry. If you have dry skin, choose a soft cleanser that keeps your skin comfortable.

Step 2: Apply Moisturizer
Moisturizer is one of the most important basic makeup steps. Many beginners skip it, but that can make makeup look dry, patchy, or uneven.
Apply moisturizer after cleansing. Use a small amount and spread it gently over your face and neck. Let it absorb for a few minutes before applying the next product.
Moisturizer helps create a smooth base. It also makes foundation look more natural. Even oily skin needs moisturizer. The key is to choose the right type.
For oily skin, use a lightweight gel moisturizer. For dry skin, use a richer cream. For sensitive skin, choose a gentle formula.
Step 3: Use Sunscreen for Daytime Makeup
If you are doing makeup during the day, sunscreen is very important. It protects your skin and keeps your beauty routine complete.
Apply sunscreen after moisturizer and before primer. Use enough product for your face and neck. Wait a few minutes so it settles into the skin.
Some people avoid sunscreen because they think it makes makeup greasy. But the right sunscreen can sit well under makeup. If your skin is oily, choose a lightweight or matte sunscreen. If your skin is dry, choose a hydrating sunscreen.
Sunscreen is not only skincare. It is also part of a smart makeup routine, especially for everyday makeup.
Step 4: Apply Primer
Primer prepares your skin for makeup. It helps smooth the face, reduce the look of pores, control shine, or add hydration. It also helps makeup stay fresh for longer.
Apply a thin layer of primer after sunscreen. Focus on the T-zone, nose, forehead, chin, and any area where makeup fades quickly.
If your skin is oily, choose a mattifying primer. If your skin is dry, choose a hydrating primer. If you want glow, choose an illuminating primer.
Do not use too much primer. A small amount is enough. Too much product can make foundation slide or pill.
This step is helpful for a flawless makeup look, especially if you want your base to last through heat, sweat, or long hours.
Step 5: Apply Foundation
Foundation helps even out your skin tone. It creates a smooth base for the rest of your makeup. Good foundation application is about choosing the right shade and blending it well.
Start with a small amount of foundation. Apply it to the center of the face, then blend outward. You can use a makeup sponge, foundation brush, or clean fingers.
A damp sponge gives a soft and natural finish. A brush gives more coverage. Fingers work well for light products like BB cream or skin tint.
Do not apply too much foundation at once. Thin layers look better than one heavy layer. If you need more coverage, add a little more only where needed.
Also, blend foundation toward the neck. This helps avoid a visible line between your face and neck.
Step 6: Apply Concealer
Concealer gives extra coverage where foundation is not enough. It is used under the eyes, around the nose, on blemishes, redness, acne marks, or dark spots.
For concealer application, use a small amount. Apply it in thin layers. Too much concealer can crease or look heavy.
Under the eyes, apply concealer near the inner corner and outer corner. Blend gently with a sponge, brush, or fingertip. Around the nose or spots, tap the product into the skin instead of rubbing.
For dark circles, choose a shade slightly lighter than your foundation. For blemishes, choose a shade close to your skin tone.
Concealer can make the face look fresh and awake when used correctly.
Step 7: Set Your Base with Powder
Setting powder helps lock foundation and concealer in place. It also controls shine and reduces creasing. This step is useful for oily areas and long-wear makeup.
Use a fluffy brush for a light layer. Use a powder puff if you need more control under the eyes or on the T-zone.
Apply setting powder under the eyes, around the nose, on the forehead, and on the chin. If your skin is dry, use powder only where needed. Too much powder can make dry skin look rough.
For oily skin, powder is very helpful. It keeps the base fresh and helps makeup last longer.
Remember, powder should set the makeup, not cover the skin with a heavy layer.
Step 8: Apply Bronzer
Bronzer adds warmth to the face. After foundation, the face can look flat because one shade covers the natural shadows and warmth. Bronzer brings life back to the skin.
Apply bronzer to the areas where the sun naturally touches your face. These include the forehead, cheekbones, and jawline.
Use a fluffy brush. Blend softly. Do not make harsh lines.
Bronzer is different from contour. Contour creates shadow and shape. Bronzer adds warmth. Beginners can start with bronzer because it is easier to use.
For a natural makeup look, choose a bronzer that is only a little deeper than your skin tone.
Step 9: Add Blush
Blush adds color to the cheeks. It makes the face look fresh, soft, and healthy. This is one of the easiest steps in a makeup step by step routine.
Smile gently and apply blush to the apples of your cheeks. Then blend it upward toward the temples. This gives a lifted look.
For fair to medium skin, soft pink, peach, and rose shades look beautiful. For deeper skin tones, coral, berry, terracotta, and warm pink shades work well.
You can use powder blush, cream blush, or liquid blush. Powder blush is easier for beginners. Cream blush gives a fresh dewy finish.
Use a small amount first. You can always add more.
Step 10: Apply Highlighter
Highlighter adds glow to the face. It reflects light and makes the skin look radiant.
Apply highlighter to the high points of the face. These areas include the cheekbones, brow bone, nose bridge, inner corners of the eyes, and Cupid’s bow.
Use a light hand. Too much highlighter can look shiny instead of glowing. For daily makeup, choose a soft glow. For party makeup, you can use a brighter highlighter.
Powder highlighter is easy for beginners. Cream or liquid highlighter gives a more skin-like glow.
Highlighter is optional, but it can make the final look more polished.
Step 11: Apply Eyeshadow
Eye makeup can be simple or bold. For beginners, neutral eyeshadow shades are the easiest choice.
Start with a light shade all over the eyelid. Then apply a medium shade in the crease. Blend it softly so there are no harsh lines. If you want more depth, add a darker shade to the outer corner.
For a daily look, use beige, brown, peach, or soft pink shades. For evening makeup, you can add shimmer or deeper colors.
A simple eye makeup tutorial should focus on blending. Blending makes eyeshadow look smooth and professional.
Use a clean blending brush and soft circular motions.
Step 12: Apply Eyeliner
Eyeliner defines the eyes. It can make the lashes look fuller and the eyes more shaped.
For beginners, pencil eyeliner is easier than liquid eyeliner. Brown eyeliner gives a soft look. Black eyeliner gives more drama.
Apply eyeliner close to the upper lash line. Keep the line thin at first. You can make it thicker if needed.
If you want winged eyeliner, draw a small wing from the outer corner, then connect it to the lash line. Keep both eyes balanced.
Do not worry if it is not perfect at first. Eyeliner takes practice.
Step 13: Apply Mascara or Lashes
Mascara opens the eyes and makes lashes look longer, darker, and fuller. It is one of the best products in makeup for beginners.
Curl your lashes first if needed. Then apply mascara from the roots to the tips. Wiggle the wand slightly as you move upward. This helps separate the lashes.
Apply one or two coats. Too many coats can make lashes clumpy.
If you like a more dramatic look, you can use false lashes or magnetic lashes. These are best for events, parties, or glam makeup.
For daily makeup, mascara alone is enough.
Step 14: Fill and Shape Your Brows
Brows frame the face. Even light brow makeup can make your face look more polished.
Brush your brows upward with a spoolie. Then fill gaps with a brow pencil, brow powder, or brow gel. Use short, hair-like strokes.
Do not draw thick harsh lines. Natural brows look softer and more modern.
Choose a brow shade close to your natural hair color. If your brows are very dark, choose a slightly softer shade so they do not look too heavy.
Finish with brow gel if you want the hairs to stay in place.
Step 15: Apply Lip Liner and Lipstick
Lip makeup completes the face. Start by making sure your lips are soft. If they are dry, apply lip balm first and remove extra balm before lipstick.
Use lip liner to shape the lips. Follow your natural lip line. Then fill in with lipstick, lip gloss, or lip tint.
For everyday makeup, nude, pink, peach, and soft brown shades work well. For party makeup, red, berry, mauve, and deep rose shades look beautiful.
If you want fuller-looking lips, add a little gloss in the center of the lips.
A clean lip makeup tutorial should show both lining and filling because both steps help the lipstick look neat.
Step 16: Finish with Setting Spray
The final step in how to apply makeup step by step with pictures is setting spray. It helps lock makeup in place and makes the layers look more blended.
Hold the bottle a few inches away from your face. Close your eyes. Spray lightly in an X and T motion. Let it dry naturally.
Use matte setting spray if your skin is oily. Use dewy setting spray if you want glow. Use long-wear setting spray for events, weddings, or hot weather.
Setting spray is not always required, but it is very useful if you want your makeup to last longer.
Correct Order to Apply Makeup
Here is the simple order to follow:
- Cleanser
- Moisturizer
- Sunscreen
- Primer
- Foundation
- Concealer
- Setting powder
- Bronzer
- Blush
- Highlighter
- Eyeshadow
- Eyeliner
- Mascara or lashes
- Brows
- Lip liner
- Lipstick or gloss
- Setting spray
This order works well for most beginners. However, makeup is personal. Some people do eyes before face makeup, especially when using dark eyeshadow. But for daily makeup, this order is simple and easy.
Simple Everyday Makeup Step by Step
If you want a quick routine, you do not need all products. You can create a fresh look in fewer steps.
A simple everyday routine includes:
- Cleanse and moisturize
- Apply sunscreen
- Use concealer where needed
- Add light powder
- Apply blush
- Use mascara
- Fill brows lightly
- Apply lipstick or gloss
- Finish with setting spray
This routine is good for college, work, casual outings, and daily wear. It gives a fresh look without feeling heavy.
For a soft daily look, use less product and blend well.
Makeup Tips for Oily Skin
Oily skin can make makeup fade faster. It can also make the T-zone shiny.
For oily skin:
- Use a lightweight moisturizer
- Apply mattifying primer
- Choose matte or oil-free foundation
- Set with powder
- Use matte setting spray
- Keep blotting paper for touch-ups
Do not skip moisturizer. If oily skin becomes too dry, it may produce even more oil.
Use thin layers. Heavy layers can slide in heat and humidity.
Makeup Tips for Dry Skin
Dry skin needs extra care before makeup. If the skin is not hydrated, foundation can cling to dry patches.
For dry skin:
- Use a gentle cleanser
- Apply rich moisturizer
- Use hydrating primer
- Choose dewy foundation
- Use less powder
- Try cream blush or liquid highlighter
- Finish with a hydrating setting spray
Skin prep is the most important step for dry skin. When the skin is soft and hydrated, makeup looks smoother.
Makeup Tips for Combination Skin
Combination skin has both oily and dry areas. The T-zone may be oily, while cheeks may be dry or normal.
For combination skin:
- Use balanced skincare
- Apply mattifying primer only on oily areas
- Use hydrating primer on dry areas
- Set only the shiny parts with powder
- Avoid too much product on dry patches
Treat each area based on what it needs. This helps the makeup look even.
Common Makeup Mistakes Beginners Should Avoid
Beginners often make small mistakes. These mistakes are easy to fix.
Avoid these common issues:
- Skipping skin prep
- Using the wrong foundation shade
- Applying too much foundation
- Not blending into the neck
- Using too much concealer
- Applying too much powder
- Making brows too dark
- Not blending eyeshadow
- Applying blush too low
- Using dirty brushes
- Skipping makeup removal at night
The best makeup looks blended, balanced, and soft. If your makeup looks too heavy, press a damp sponge over the skin to remove extra product.
How to Make Makeup Look Natural
A natural makeup look depends on light layers and good blending. Use only as much product as you need.
Choose a foundation that matches your skin. Apply concealer only where needed. Use soft blush, light mascara, natural brows, and a simple lip color.
Avoid too much powder, highlighter, or contour for daily makeup. Let your real skin show through a little.
Natural makeup does not mean no makeup. It means makeup that looks fresh, clean, and soft.
How to Make Makeup Last Longer
If you want makeup to last all day, focus on prep and setting.
Use primer before foundation. Apply thin layers. Set oily areas with powder. Use waterproof mascara if needed. Finish with setting spray.
In hot weather, avoid very heavy layers. Light layers last better and look fresher.
Also, avoid touching your face again and again. Touching transfers oil and moves makeup.
For long days, carry lipstick, compact powder, and blotting paper for quick touch-ups.
Makeup Tools for Better Application
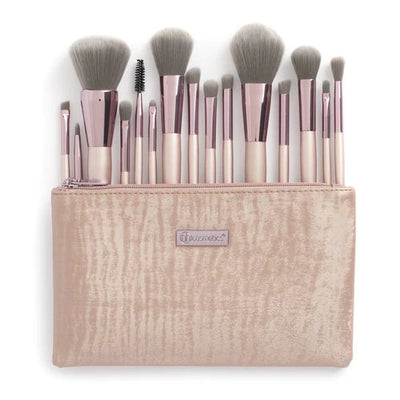
The right makeup tools make application easier. Beginners do not need too many brushes, but a few basics are useful.
Good starter tools include:
- Makeup sponge for foundation and concealer
- Powder brush for setting powder
- Blush brush for cheeks
- Small brush for highlighter
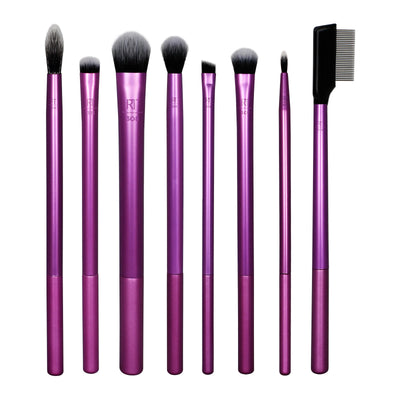
- Eyeshadow brush for eyelids
- Blending brush for crease
- Brow spoolie for brows
Clean your tools often. Dirty brushes can make makeup look patchy and may affect the skin.
Good tools help your makeup blend better and look more professional.
FAQs About How to Apply Makeup Step by Step with Pictures
What is the correct order to apply makeup?
The correct order is skincare, primer, foundation, concealer, setting powder, bronzer, blush, highlighter, eyeshadow, eyeliner, mascara, brows, lips, and setting spray.
How do I apply makeup step by step as a beginner?
Start with clean skin. Apply moisturizer, sunscreen, primer, foundation, concealer, powder, blush, eye makeup, brows, lipstick, and setting spray. Keep each layer light and blend well.
Should I apply foundation or concealer first?
For most makeup looks, apply foundation first and concealer after. Foundation evens the skin, and concealer adds extra coverage only where needed.
What should I apply before foundation?
Before foundation, apply moisturizer, sunscreen, and primer. These steps help create a smooth base and make foundation blend better.
How do I apply foundation smoothly?
Use a small amount of foundation and blend from the center of the face outward. Use a damp sponge or foundation brush for a smooth finish.
How do I apply concealer without creasing?
Use a small amount of concealer. Blend gently and set it lightly with powder. Avoid using too much product under the eyes.
How do I make makeup look natural?
Use light layers, choose the right foundation shade, blend well, and avoid too much powder. Soft blush, mascara, and natural lipstick also help.
Is setting spray necessary?
Setting spray is not compulsory, but it is helpful. It can keep makeup fresh, reduce a powdery look, and help makeup last longer.
What makeup products does a beginner need?
A beginner needs moisturizer, sunscreen, primer, foundation or BB cream, concealer, powder, blush, mascara, brow product, lipstick, setting spray, and basic tools.
Can I apply makeup without foundation?
Yes, you can. Use concealer only where needed, then apply powder, blush, mascara, brows, lipstick, and setting spray for a light natural look.
Final Thoughts
Learning how to apply makeup step by step with pictures makes the whole process easier. When you can see each step clearly, you understand where products go and how they should look. This is especially helpful for beginners.
Start with clean and moisturized skin. Apply primer, foundation, concealer, powder, bronzer, blush, highlighter, eyes, brows, lips, and setting spray in the right order. Use thin layers and blend everything well.
A good makeup routine is not about using too many products. It is about using the right products in the right way. With practice, your makeup can look fresh, smooth, natural, and polished.
If you are building your beauty kit, explore Khayest for authentic makeup products, brushes, sponges, lashes, skincare, and beauty tools. The right products can help you create a clean everyday look, a soft glam look, or a full-face makeup look with confidence.